Category / Recipes

5
Jun

Bird on a Fire Smoked Chicken

Bird on a Fire Smoked Chicken

When it’s done right, smoked chicken is juicy and lusciously redolent of smoke, spice, and sauce, along with the flavor of the meat itself—all in equal measure. We lightly season the outside of the bird with garlic salt to draw moisture from the skin so the fat renders and the skin comes out deliciously crispy.

Half-birds are easier to position and move around than whole ones. Additional advantages of half-chickens over separated chicken parts include that you have fewer pieces to corral and less juice draining from the meat while it cooks, and you end up with larger expanses of crispy skin. Use apple, wild cherry, peach, or pecan woods for chicken; hard woods such as hickory or oak impart an overpoweringly strong flavor.

There is no end to the delicious uses for leftover smoky chicken—shredded, cubed, or sliced. Our favorite ways to repurpose include atop salads, baked potatoes, and nachos.


Bird on a Fire

Recipe makes 2 to 4 servings

  • 1 whole chicken (3 to 3 1/2 pounds), very cold 

  • Garlic salt 

  • Magic Dust®

  • 17ST Hog Warsh Barbecue Sauce, warm 

  • 3 to 5 pounds good-quality lump charcoal (we use Royal Oak) 

  • 1 small (8-inch) piece of apple wood or 2 store-bought chunks 

  • String mop 

Use poultry shears to cut along each side of the backbone to remove it; discard. Open up the bird, lay it skin side up on a cutting board, and press down firmly to flatten. Trim off and discard the hunk of excess fat at the tail end and cut through the breastbone to halve the chicken. Flip the halves over and straighten out the skin on each half. Twist each wing tip upward and over the rest of the wing and tuck it in so that the “elbow” of the wing sticks up in the air. (This is purely for aesthetics; if you leave the wing be, there will be a white spot where the smoke doesn’t hit the skin.)

Very lightly season the chicken with garlic salt and Magic Dust, coating so thinly that it’s barely visible. Set the chicken halves on a baking sheet, cover them with plastic wrap, and refrigerate until you’re ready to put them on the cooker.

Set up the cooker for indirect-heat smoking: Open the top and bottom vents. Pile 3 pounds of the charcoal in one half of the cooker, leaving the other half empty. Load a chimney no more than one-quarter full of charcoal and light it. When the coals are glowing, dump them on top of the pile of charcoal in the cooker. Set the wood on top of the coals, replace the grate, and put the chicken on, bone side down, over the side with no coals (the indirect cooking area). Close the lid. 

Don’t open the cooker for 1 hour, but keep a close eye on the temperature; when it reaches 185°, which might happen very quickly, close the vents about halfway so that less air comes in to feed the fire and the heat in the cooker rises slowly. Let the temperature climb to between 250° and 275°. Maintain your target temperature for the duration of the cook. 

Throughout the entirety of the cook, be on the lookout for fluctuations in cooker temperature. If it dips more than 5° below your target and opening the vents isn’t sufficient to bring it back up, you will need to add a few coals. If at any point the temperature climbs above your target by more than 5°, close the top and bottom vents further so that even less air comes in to feed the fire. 

After an hour, open the lid and check the edges of the chicken closest to the fire. If they look like they’re beginning to brown, rotate the chicken, moving the half farther away from the fire and placing it closer, and vice versa. 

Close the lid and continue smoking the chicken for another hour, checking the color and the edges every 20 minutes. Never flip the pieces over; instead, continue rotating them to cook evenly. 

Prepare another round of charcoal in the chimney, filling it halfway and lighting it, so you’ll have additional hot coals if you need them. This cook should not require more charcoal than the initial amount, but we always keep some coals at the ready just in case more are needed to maintain target cooker temperature. 

After 2 hours, use an instant-read thermometer to check for doneness: Insert the probe into the thickest part of the thigh; if the probe slides in easily, the meat is nearly done. The temperature will read between 165° and 170°. 

When the temperature reaches 170°, mop the chicken with a thin coat of Hog Warsh (it will ball up a bit—don’t worry), then close the lid for just a minute to let it dry a bit. Mop with a second thin coat and give a final sprinkle of Magic Dust. Pull the chicken halves off the cooker and set them on a cutting board to rest, uncovered, for about 10 minutes before serving. 

© Mike Mills and Amy Mills, published in Praise the Lard, Houghton Mifflin Harcourt


Praise the Lard CookbookFor more recipes and revelations in barbecue culture pick up a copy of our book Praise the Lard

18
Apr

Reverse-Sear Garlic Buttered Ribeye Steaks

Mike and Phillip are in Amarillo, Texas this week, visiting family ranches with Certified Angus Beef, purveyors of the beef we use at 17th Street. Below you’ll find a method from our new book, Praise the Lard, outlining the reverse sear, our favorite way to cook steak. 


Garlic-Buttered Ribeye Steaks

Recipe makes 4 to 6 servings

The term “reverse-sear” refers to flipping the traditional sequence of steak-cooking steps so that the meat is first infused with smoke and searing happens just before serving. This is an easy route to a tender piece of meat with a delicious savory crust, especially if a perfect medium-rare is your goal—which is one of the factors determining a win, according to Steak Cookoff Association guidelines.

We like to cook boneless Certified Angus Beef prime or choice grade meat. Bone-in or boneless—the choice is yours.

  • 4 to 6 ribeye steaks (about 1 pound each, 1 to 1½ inches thick, prime or choice)
  • 17ST Brisket Rub, or Steakhouse Shake (recipe follows) or kosher salt and pepper
  • Herb and Garlic Butter (recipe follows), chilled, for serving
  • ¼ cup crumbled blue cheese, for serving (optional)
  • 2 pounds good-quality lump charcoal
  • 1 small (8-inch) piece of apple wood or 2 store- bought chunks

Up to 40 minutes prior to cooking, season the steak generously with the Brisket Rub or Steakhouse Shake. Set the steaks on a baking sheet and refrigerate them, loosely covered, until you’re ready to grill.

Set up the cooker for indirect-heat smoking: Open the top and bottom vents. Load a charcoal chimney one-quarter full of charcoal and light it. When the coals in the chimney are glowing, dump them on one side of the cooker. Set the wood on top of the coals, replace the grate, and put the steaks over the side with no coals (the indirect cooking area). Close the lid.

Don’t open the cooker for 15 minutes, but keep a close eye on the temperature (see page 84 for how best to assess and monitor cooker temperature); when it reaches 200°, which might happen very quickly, close the vents about halfway so that less air comes in to feed the re and the heat in the cooker rises slowly. Let the temperature climb to between 225° and 250° (see page 77 for how to determine your target temperature). Maintain your target temperature; if at any point it climbs more than 5° above your target, close the top and bottom vents further so that even less air comes in to feed the fire.

After 15 minutes, open the lid of the cooker and use an instant-read thermometer to check the internal temperature of the thickest part of the steak; you are looking for a slow and steady climb to 105° (for rare) or 110° (for medium-rare). This will take no longer than 20 minutes.

After you check the meat temperature, reload the chimney halfway with charcoal and light it. You’ll soon need these additional hot coals to sear the steaks at the finishing stage, after they’re done smoking.

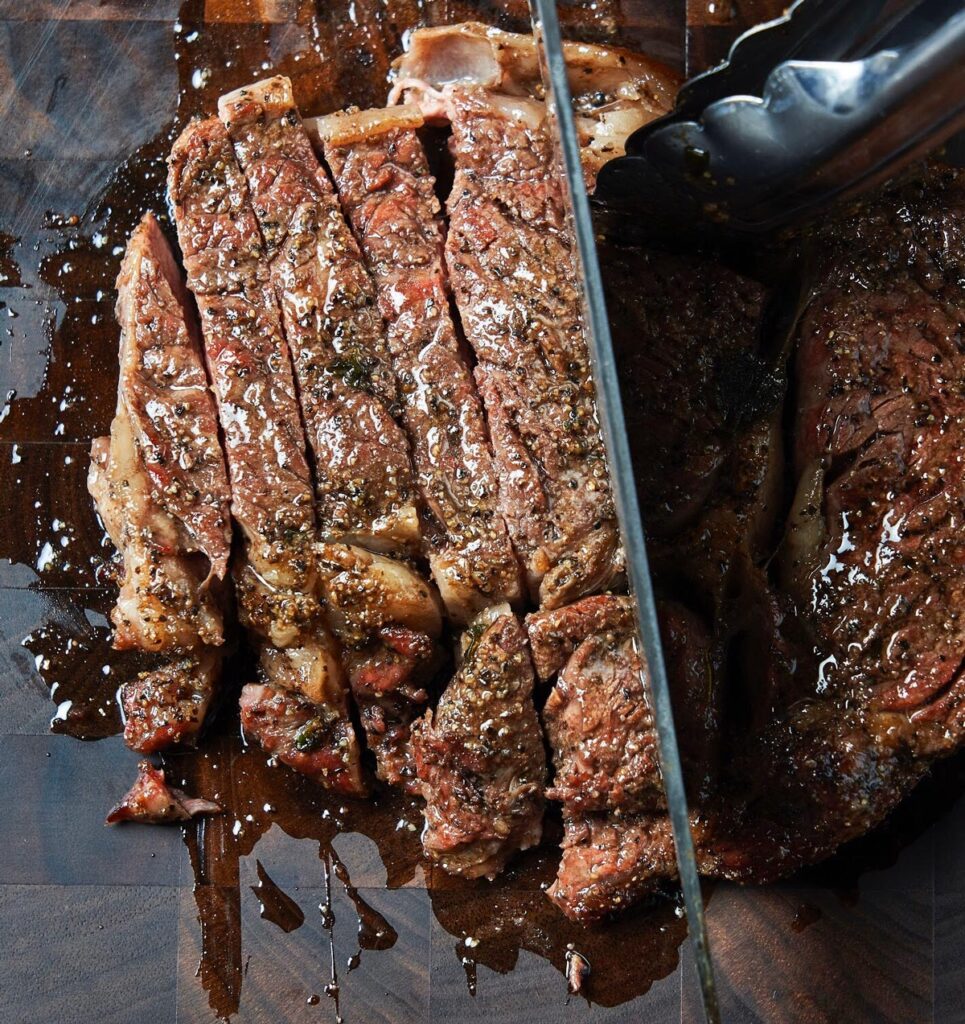
When the steaks are 105° for rare or 110° for medium-rare, set them aside on a baking sheet. Working quickly, add the hot coals and spread them out all over the bottom of the cooker. Replace the grate and put the steaks directly over the hot coals. Sear for a minute or two on each side, just until a brown crust forms and the internal temperature is 120° for rare or 130° for medium-rare. Top each steak with a slice of Herb and Garlic Butter, and blue cheese if you like, and serve.

© Mike Mills and Amy Mills, published in Praise the Lard, Houghton Mifflin Harcourt


Steakhouse Shake

Recipe makes about ½ cup

This savory blend tastes great on hamburgers, steaks, brisket, and beef ribs

  • 2 tablespoons dry mustard
  • 2 tablespoons granulated garlic
  • 2 teaspoons coarsely ground black pepper
  • 1½ teaspoons kosher salt
  • 1 teaspoon smoked sweet Spanish paprika
  • ½ teaspoon dried thyme
  • ½ teaspoon cayenne pepper

Combine all the ingredients in a small bowl and mix with a whisk to blend evenly. Store in a tightly covered container in a cool, dark place. Keeps for about 6 months, or until the color or pungent aroma fades.

© Mike Mills and Amy Mills, published in Praise the Lard, Houghton Mifflin Harcourt


Herb and Garlic Butter

Recipe makes 1 cup

Press this butter into a ramekin or roll it into a log, chill, and cut into slices to top a steak. Bring to room temperature for spreading on biscuits or buttering ears of corn, baked potatoes, or vegetables.

  • 2 cups packed fresh herb leaves of your choice (we use flat-leaf parsley, chives, and basil)
  • ½ small garlic clove
  • 8 tablespoons (1 stick) unsalted butter, softened
  • ½ teaspoon finely grated lemon zest
  • 1 teaspoon fresh lemon juice
  • ⅛ to ¼ teaspoon kosher salt
  • ⅛ to ¼ teaspoon coarsely ground black pepper

Pulse the herbs and garlic in a food processor until finely chopped. Add the butter, lemon zest, and lemon juice and process until smooth. Season with salt and pepper to taste and pulse to combine. Scrape the butter into a ramekin and cover with plastic wrap, or scrape onto a sheet of parchment paper and form into a cylinder about 2 inches in diameter. Roll the paper to cover it and twist the ends. Wrap in foil to keep airtight, and refrigerate or freeze. The butter keeps in the refrigerator for up to 1 week or in the freezer for up to 1 month.

© Mike Mills and Amy Mills, published in Praise the Lard, Houghton Mifflin Harcourt

All photos ©Ken Goodman Photography


Buy Praise the Lard for more recipes and revelations in barbecue culture

SaveSave

SaveSave

SaveSave